Photography is a powerful medium for self-expression, allowing us to capture moments and share our unique perspectives with the world. However, many beginners often find themselves overwhelmed by the myriad of camera settings available. Understanding these settings is essential for unlocking your creativity and taking your photography to the next level. In this guide, we’ll explore core camera settings, helping you gain confidence behind the lens.
1. Exposure Triangle: The Foundation of Photography
At the heart of photography lies the exposure triangle, which consists of three critical components: Aperture, Shutter Speed, and ISO. Mastering these elements is key to achieving the desired exposure and creative effects in your images.
Aperture (f-stop)
- Definition: The aperture is the opening in the lens that allows light to enter the camera.
- Impact: It affects the depth of field – the range of distance in a photo that appears sharp.
- Settings: A lower f-stop number (e.g., f/2.8) creates a shallow depth of field, which is ideal for portraits and isolating subjects. A higher f-stop number (e.g., f/16) increases the depth of field, making more of the scene in focus, suitable for landscapes.
Shutter Speed
- Definition: Shutter speed refers to the duration the camera’s shutter remains open to allow light onto the sensor.
- Impact: It affects motion in the photograph—fast shutter speeds freeze motion, while slow speeds can capture movement blur.
- Settings: A shutter speed of 1/1000 sec can freeze a fast-moving subject, while 1/2 sec can create a beautiful blur of motion in flowing water.
ISO
- Definition: ISO measures the sensitivity of your camera’s sensor to light.
- Impact: Higher ISO settings allow you to shoot in low light but can introduce noise (graininess) into your images.
- Settings: Start with an ISO of 100 or 200 in bright daylight. Increase to 800 or 1600 in dim indoor settings or at dusk, but be mindful of potential noise.
Putting It Together
To achieve the right exposure, consider how these three elements interact. For example, if you want a shallow depth of field (wide aperture), you might need to use a faster shutter speed to compensate for increased light, or lower your ISO to minimize noise.
2. Understanding White Balance
White balance (WB) is essential for making your photos look true to life. Different light sources (sunlight, fluorescent, tungsten) emit different color temperatures, which can affect the overall warmth or coolness of your images.
Common Settings
- Auto: The camera adjusts based on the scene—good for beginners.
- Daylight: Best for outdoor photos in sunlight.
- Cloudy: Warmer tones for overcast days.
- Tungsten: Corrects the yellow hue from indoor lighting.
- Custom: Allows for precise adjustments based on specific lighting conditions.
Experimenting with white balance settings can add creative flair to your photos, enhancing the mood and atmosphere.
3. Focusing Modes
Focusing is critical for sharp images. Most cameras offer various focusing modes:
- Single-Point AF: You select one focus point; ideal for stationary subjects.
- Continuous AF (AF-C): The camera continuously adjusts focus; perfect for moving subjects.
- Manual Focus: Allows for complete control over focus; useful in low light or with macro photography.
Understanding when to use each mode will help you capture well-focused images, regardless of the situation.
4. Composition Basics
While camera settings are vital, composition is equally important in creating stunning photographs. Here are a few foundational principles:
- Rule of Thirds: Divide your frame into a 3×3 grid, placing your subject at the intersections for balanced compositions.
- Leading Lines: Use natural lines in your scene (like roads or rivers) to guide the viewer’s eyes towards your subject.
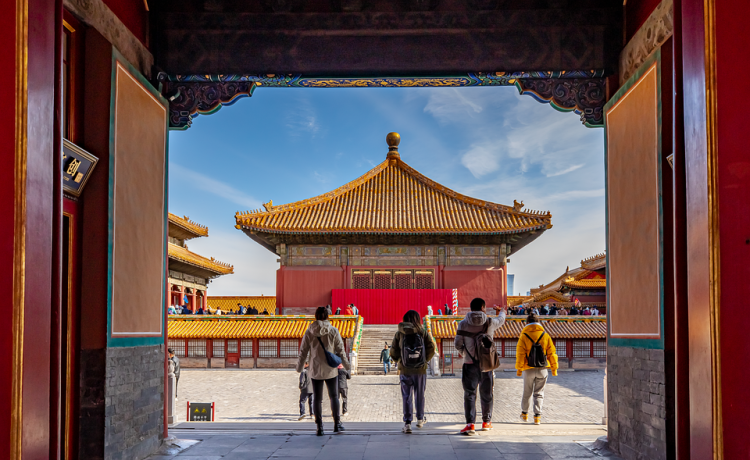
- Framing: Create a frame within the frame using branches, windows, or other elements to draw focus to your main subject.
5. Practice and Experimentation
The best way to become proficient in using your camera is practice. Don’t be afraid to experiment with different settings, compositions, and lighting conditions. Here are some tips to get you started:
- Take a Photo Walk: Explore your environment, focusing on various subjects and practicing different settings.
- Challenge Yourself: Set specific goals for each outing, such as shooting in low light or using a unique composition technique.
- Review and Reflect: After shooting, review your photos to understand what worked and what didn’t. This reflection will enhance your learning experience.
Conclusion
Mastering camera settings is a journey that enhances your creative expression and photographic skills. By understanding the exposure triangle, white balance, focusing modes, and composition, you can unlock your potential as a photographer. Remember that every expert was once a beginner; the key is to keep practicing, experimenting, and most importantly, enjoying the art of photography. Happy shooting!


